Are you tired of spending a fortune on spa treatments and body wraps? But did you know you can create your own homemade body wrap treatment at home using natural and organic ingredients? NoIt is pocket-friendly, allows you to customize the wrap to your liking, and target specific areas of your body. This article will guide you through 20 easy steps to make a homemade body wrap for weight loss.
Table of Contents (click to expand)
Why use a Body Wrap?
Body wraps have been recognized as effective relaxation, detoxification, and weight loss methods for centuries. Traditionally a luxury treatment offered at spas, body wraps create a condition similar to fever to help the body sweat, eliminating toxins and aiding in weight loss through water expulsion.
However, not everyone can afford regular spa visits. As a solution, DIY body wraps have gained popularity. These homemade versions offer a cost-effective way to enjoy the benefits of a spa body wrap from the comfort of your home. In addition, with DIY body wraps, you gain the flexibility of choosing ingredients based on your skin type, preferences, and specific needs, enhancing the effectiveness of the treatment.
The Benefits of Body Wraps for Weight Loss
Body wraps primarily facilitate water weight loss. When natural ingredients are applied to the skin, wrapped, and then heated, the body sweats and the diy body wrap absorbs the expelled toxins and excess water. This process helps in slimming the desired area by reducing water weight.
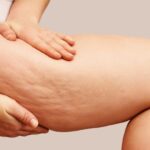
In addition to water weight loss, body wraps stimulate blood circulation, which can help reduce cellulite and stretch marks. The detoxification process brought about by the increased sweating in the body pack also aids in eliminating impurities from the body, leaving you feeling rejuvenated and refreshed.
Why Make a Homemade Body Wrap?
There are several advantages to creating your body wrap at home:
- Affordability: DIY body wraps are significantly cheaper than spa treatments. Buying natural ingredients and essential oils in bulk can save you money, enabling you to create multiple treatments for the cost of a single spa visit.
- Customization: You can target specific areas of your body and tailor your ingredients based on your particular needs, skin type, and preferences.
- Healthier Choice: By choosing your ingredients, you can avoid potentially harmful chemicals often in commercial wraps. Opting for organic and natural ingredients ensures you’re nurturing your body with pure, wholesome substances.
Safety Precautions Before Starting
Although DIY body wraps can be beneficial, it’s essential to consider some safety precautions:
- Skin Sensitivity: Always conduct a patch test before applying any new ingredient to your body. Some people may be allergic or sensitive to certain essential oils or natural ingredients.
- Health Conditions: If you have any underlying health conditions or are pregnant, consult a healthcare professional before starting any new treatment, like body wraps.
- Avoid Full-Body Wraps: Never wrap your entire body in plastic or saran wrap, as it could lead to overheating and may be dangerous. Instead, targeting specific areas is best to ensure you’re comfortable and not feeling excessively hot or suffocated during the process.
Remember, while body wraps can support your weight loss journey by shedding water weight and promoting relaxation, they are not a substitute for a balanced diet and regular exercise. Always treat body wraps as a supplemental treatment, not the main solution for weight loss.
Step 1: Gather Supplies
The first step in making your own body wrap is to gather all the necessary supplies. Here’s a list of what you’ll need:
- Natural or organic ingredients (we’ll cover this in step 2)
- Essential oils (optional)
- Plastic sheet or wrap
- Ace wrap
- A warm blanket or heating pad
- Warm water
- Bowl
- Towels
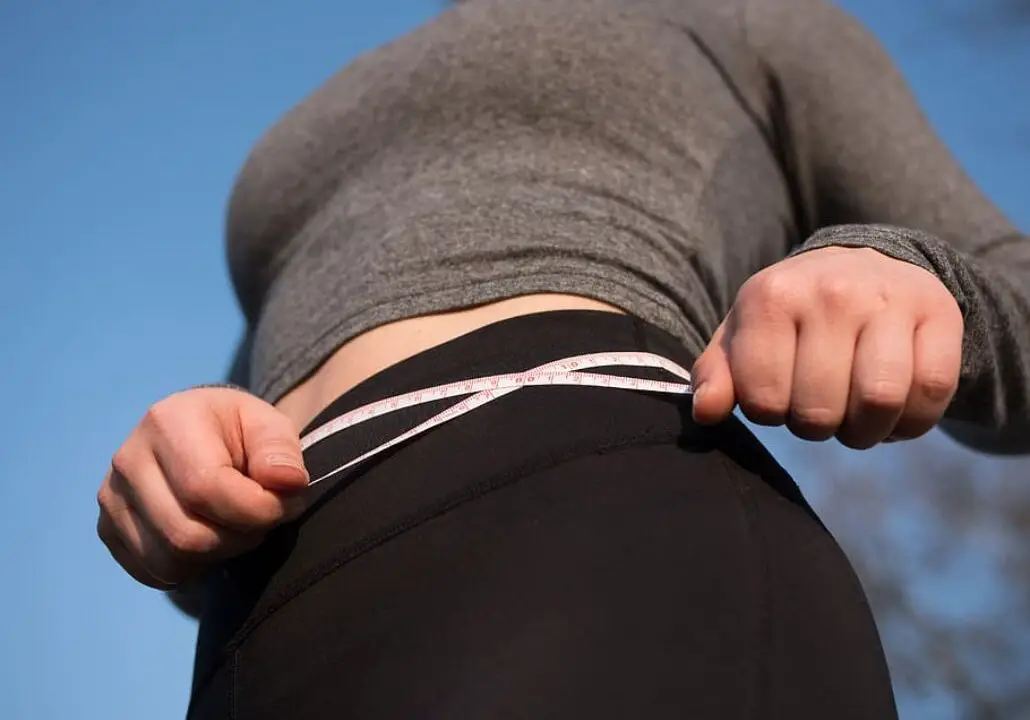
- Measuring tape
Most of these items are found at your local health food store or online. Try to use organic ingredients whenever possible to avoid exposure to harmful chemicals.
Step 2: Choose the Right Ingredients
Choosing the ingredients for your homemade body wrap is crucial for achieving your desired results. Here are some popular and effective elements to consider:
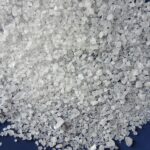
Epsom Salt
Epsom salt is made of magnesium sulfate and has numerous health benefits, including reducing inflammation and relieving muscle pain. When used in a body wrap, it can help draw toxins out of the body and reduce water weight. Mix the Epsom salt with warm water to create a paste-like consistency and apply it to the desired area.
Seaweed Powder
Seaweed powder contains vitamins and minerals that can nourish the skin and improve its elasticity. When used in a body wrap, it can help reduce cellulite and improve blood flow. Mix the seaweed powder with warm water to create a paste and apply it to the desired area.
Green Tea
Green tea is known for its antioxidant properties and can help flush out toxins from the body. When used in a body wrap, it can help reduce inflammation and improve the appearance of the skin. Steep several green tea bags in boiling water and let them cool. Apply the tea to the desired area using a brush or cloth.
Organic Clay
For centuries, organic clay has been used to detoxify the body and improve blood circulation. When used in a body wrap, it can help reduce cellulite and promote inch loss. Mix the organic and clay mixture with warm water to create a paste and apply it to the desired area.
Herbal or Natural Ingredients
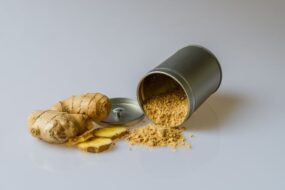
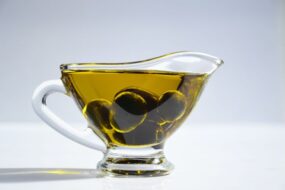
You can also use natural ingredients such as almond oil, coconut, olive oil, apple cider vinegar, orange peel powder, lime juice, rosemary essential oil, and lemon essential oil. These ingredients have various health and beauty benefits and can be mixed to create your wrap recipe.
Step 3: Prepare Your Skin
Before applying the body wrap, preparing your skin properly is important. This will help ensure maximum absorption of the ingredients and minimize any potential irritation.
Exfoliation
Start by exfoliating your skin using a body scrub or a dry brush. This will help remove dead skin cells and improve blood circulation. Pay special attention to areas with rough skin, such as elbows, knees, and ankles.
Cleansing
Cleanse your entire body with warm water and mild soap. This will help remove any dirt or sweat from your skin surface and create a clean surface for the wrap.
Hydration
Drink plenty of water before and after the wrap to keep your body hydrated. This will also help flush out toxins from the body.
Step 4: Measure and Cut the Wraps
Measure the area that you want to wrap using a measuring tape. Cut the plastic wrap or sheet to the appropriate size, leaving a few inches of extra material on each side. You can also cut the ace wrap to the same size as the plastic wrap.
Step 5: Apply the Wrap
Apply a thin layer of the chosen ingredients to the desired area. Make sure to spread the mixture evenly and avoid clumps. Place the plastic wrap over the mixture and use the ace wrap to secure it. Leave some space between the wrap and your skin to allow breathing and prevent overheating.
Step 6: Wrap Up
Wrap yourself up in a warm blanket or use a heating pad to keep your whole body warm during the wrap. This will help open up your pores and improve the absorption of the ingredients.
Step 7: Relax and Wait for
Relax and wait for about an hour while the wrap treatment does its magic. You can read a book, watch TV, or even nap. Just make sure to avoid any physical activity that may cause sweating.
Step 8: Unwrap and Rinse
After the desired time has passed, unwrap yourself and rinse off the mixture with warm water. Use a towel to pat dry your skin.
Step 9: Moisturize
Apply a moisturizer or body oil to your skin after the wrap to keep it hydrated. This will also help improve the appearance and texture of your skin.
Step 10: Repeat for Best Results
Repeat the body wrap treatment once or twice weekly for the best results. You can also track your progress by measuring yourself before and after each body wrap helps. Remember to stay hydrated and maintain a healthy diet and exercise routine for optimal weight loss results.
Step 11: Use Essential Oils
Adding essential oils to your homemade body wraps can improve the aroma and enhance the wrap’s benefits. Here are some popular essential oils to consider:
Lemon Essential Oil
Lemon essential oil is known for its detoxifying properties and can help improve blood circulation. When used in a body wrap, it can help the fat cells reduce cellulite and prevent water retention.
Rosemary Essential Oil
Rosemary essential oil has anti-inflammatory and analgesic properties and can help soothe sore muscles after a workout. When used in a body wrap, it can help reduce inflammation and improve skin tone.
Orange Essential Oil
Orange essential oil is rich in antioxidants and can help rejuvenate the skin. When used in a body wrap, it can help reduce stress and anxiety while promoting relaxation.
Lavender Essential Oil
Lavender essential oil is well-known for its calming properties and can help relieve stress and insomnia. In addition, when used in a body wrap, it can help improve skin texture and tone.
To use essential oils in your body wrap, mix a few drops with the other ingredients before applying plastic wraps to the skin.
Step 12: Avoid Harmful Chemicals
When making your body wraps, it’s important to avoid using any harmful chemicals that may be found in commercial wraps. Some of these chemicals include aluminum, parabens, and sodium laureth sulfate. These chemicals can cause irritation, skin damage, and even long-term effects on your health. Instead, research natural and organic ingredients before purchasing any products.
Step 13: Try Different Recipes
There are countless recipes for homemade body wraps that you can try, depending on your preferences and goals. For example, you can make a wrap with coffee grounds and coconut oil to target cellulite or a wrap with green tea and honey to improve skin texture. Experiment with different ingredients and essential oils combinations to find the perfect recipe.
Step 14: Focus on Problem Areas
If you have specific areas of your body that you want to target, such as your stomach or thighs, focus on those areas when applying the wrap. Use a larger plastic wrap or sheet to cover the entire region, and apply the mixture evenly.
Step 15: Use a Heating Pad
Using a heating pad during your body wrap can help enhance the benefits of the wrap. The heat from the pad can help open up your pores and improve the absorption of the ingredients. Make sure to use a heating pad that is safe and free of any harmful chemicals.
Step 16: Take a Warm Shower
After rinsing off the wrap, take a warm shower to open up your pores further and help remove any remaining residue. Use a mild soap and avoid harsh scrubbing, which can irritate sensitive skin further.
Step 17: Eat a Healthy Diet
While homemade body wraps can help you lose water weight and inches, it’s essential to maintain a healthy diet and exercise routine to achieve long-term weight loss goals. Focus on eating whole foods and avoiding processed and high-fat foods.
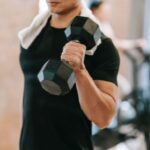
Step 18: Exercise Regularly
Regular exercise can help you lose weight and improve your overall health. Incorporate cardiovascular activities such as running or cycling and strength training exercises such as weightlifting or yoga.
Step 19: Consider Professional Treatments
If you’re not seeing the desired results from your DIY body wraps, consider getting a professional body wrap treatment at a spa or salon. These treatments use specialized equipment and products to help enhance the benefits of the natural body wrap.
Step 20: Enjoy the Benefits
Making your own body wraps at home can save money and help you relax and improve your overall health. Enjoy the beauty and health benefits of your DIY body wraps, and experiment with different ingredients and recipes to find the perfect combination for your needs.
Conclusion
In conclusion, making a homemade body wrap for weight loss is easy and affordable. With just a few natural ingredients and basic supplies, you can create your own spa treatment at home and achieve your weight loss goals. Remember to choose organic ingredients, prepare your skin correctly, and follow the safety precautions to avoid adverse reactions. And most importantly, enjoy the relaxation and beauty benefits of your DIY body wraps!

Recent posts


Recent Post
Gallery